Are your TPE adult products failing to create a truly memorable experience? You’ve got the shape right, but the surface feel is generic, leaving customers underwhelmed. This can lead to missed sales as users search for more unique and satisfying sensations that your products just don’t deliver.
The key to creating bestselling TPE adult products lies in sensory engineering—the art of designing and manufacturing specific textures that enhance pleasure. This involves selecting the right TPE grade, precisely machining molds, and controlling the injection process to create surfaces ranging from silky smooth to intensely stimulating, directly improving user satisfaction.
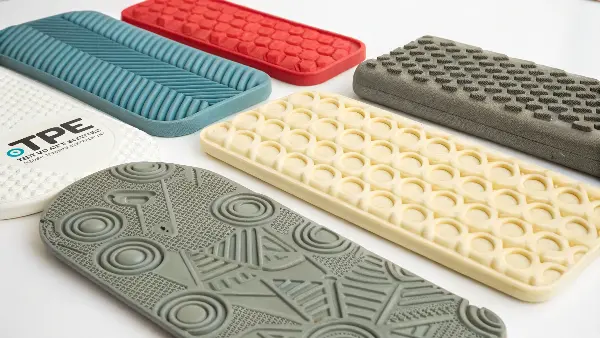
It’s about more than just aesthetics. Texture is a fundamental part of the user experience. As a brand owner, you’re not just selling a product; you’re selling a feeling, an experience. I’ve spent years in this industry, and I’ve seen firsthand how a well-designed texture can transform a good product into a great one. It’s the difference between a one-time purchase and a loyal customer who trusts your brand to deliver a superior experience every time. Let’s explore how you can master this crucial element for your own product line.
Why is TPE the Ultimate Material for Crafting Lifelike Textures?
You’re looking for a material that feels great and gives you endless design freedom. But many materials are either too rigid to feel lifelike or too difficult to mold with precision. This can limit your creativity and result in products that don’t meet customer expectations for comfort and sensation.
TPE (Thermoplastic Elastomer) is the ideal material for textured adult products because it combines the soft, skin-like feel of rubber with the easy processing of plastic. Its wide range of available hardness levels (from super-soft to firm) allows for unparalleled precision in creating everything from subtle nubs to pronounced ridges, ensuring both comfort and stimulation.
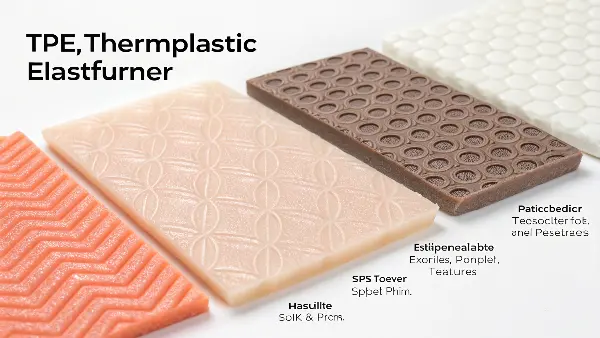
In my early days of manufacturing, we experimented with various materials. But nothing offered the versatility of TPE. Its ability to capture minute details from the mold is incredible. I remember we were working on a product inspired by natural patterns. With TPE, we could perfectly replicate the delicate, organic texture we envisioned. The material’s properties allow you to control not just the look, but the exact tactile feel you want to provide. It’s this level of control that makes TPE the go-to choice for sensory engineering. It allows us to innovate continuously and create textures that truly connect with the user on a sensory level. This is fundamental for any brand looking to stand out in a crowded market.
TPE Properties and Their Impact on Texture
The secret to TPE’s success lies in its unique material properties. Understanding these helps you make better decisions during product development.
-
Shore Hardness: TPE is available in a wide spectrum of hardness levels, measured on the Shore scale (usually Shore A or Shore 00 for soft toys). A softer TPE (e.g., Shore 00-30) will make textures feel gentle and yielding, great for beginners or for products intended for sensitive areas. A firmer TPE (e.g., Shore A 10-25) provides more defined feedback from ridges and bumps, appealing to users seeking more intense sensation.
-
Elasticity and Rebound: TPE has excellent elasticity, meaning it can stretch and return to its original shape. This property ensures that textures feel dynamic and responsive during use, rather than static and hard. It contributes to a more lifelike and engaging experience.
-
Surface Finish: TPE can be molded to have various surface finishes, from a matte, velvety feel to a slick, glossy one. The base finish profoundly impacts how the molded textures are perceived. A matte finish can feel more intimate and skin-like, while a slicker finish can work well with lubricants for a different kind of sensation.
Here’s a simple comparison of TPE and body-safe Silicone for texture creation:
| Feature | Thermoplastic Elastomer (TPE) | Body-Safe Silicone |
|---|---|---|
| Texture Detail | Excellent. Captures very fine details from the mold. | Excellent. Also captures fine details very well. |
| Hardness Range | Very wide range, especially in the super-soft spectrum. | Wide range, but can be harder to achieve ultra-soft feel. |
| Feel | Often described as velvety, warm, and skin-like. | Can feel smooth and silky, sometimes slightly cooler. |
| Processing | Simpler and faster. It can be melted and re-molded. | More complex (curing process). Cannot be re-melted. |
| Cost-Effectiveness | Generally more cost-effective for mass production. | Typically more expensive due to raw material and process. |
For brands focused on intricate textures and a specific skin-like feel, TPE often provides the perfect balance of performance and production efficiency.
How Do You Match TPE Textures to Your Target Audience’s Desires?
You’ve developed a product with an intricate texture you think is amazing. But sales are flat, and feedback is mixed. The problem might be a mismatch between your design and what your customers actually want. A texture that excites one user might be overwhelming or uninteresting to another.
To succeed, you must align texture design with your target demographic’s experience level and desired stimulation type. Beginners often prefer smoother, gentler patterns, while experienced users may seek intense, complex textures. Researching your audience’s preferences for clitoral, G-spot, or internal stimulation is crucial for creating a product they will love.
I learned this lesson the hard way. We once launched a toy with a very complex, multi-layered texture. We thought it was revolutionary. But our primary audience at the time consisted of people new to toys. The feedback was clear: it was "too much." We realized we hadn’t designed for them; we had designed for ourselves. Now, audience research is the first step in every project. We create detailed customer personas and often run small focus groups with prototypes. This direct feedback is priceless and ensures the final product doesn’t just look good in a render, but feels incredible to the person it’s made for.
A Framework for Audience-Centric Texture Design
Designing for your audience isn’t guesswork; it’s a strategic process. You need to segment your market and create textures that speak directly to each group’s needs and fantasies.
1. Identify Your User Personas:
Who are you selling to? The more specific you are, the better. Consider their experience level, age, and what they are looking for in a product.
- The Beginner: Often seeks comfort, reassurance, and gentle sensations. They might be nervous about trying toys for the first time.
- The Explorer: Has some experience and is looking to try new things. They are open to more noticeable textures but may not want anything too extreme.
- The Connoisseur: An experienced user who knows what they like. They often seek intense, specific, or novel sensations and appreciate complex and well-defined textures.
2. Map Textures to Stimulation Type:
Different areas of the body respond to different types of touch. Your texture design should reflect this.
- Clitoral Stimulation: This area is highly sensitive. Textures should often be smaller, softer, and more varied. Think gentle waves, soft nubs, or flickering patterns.
- G-Spot Stimulation: This requires a firmer touch and more defined shapes. Pronounced ridges, swells, and distinct bumps are often effective here.
- Internal Stimulation (General): Can range from subtle ripples that create a feeling of fullness to spiral patterns that provide sensation along the entire length.
- External/Partner Play: Textures here can be more about visual appeal and tactile interest for the hands as well as other body parts.
3. Develop a Texture Strategy:
Based on your personas and the intended use, you can build a clear strategy. Here’s an example table to guide your thinking:
| User Persona | Primary Goal | Recommended TPE Textures | Example Product Concept |
|---|---|---|---|
| The Beginner | Comfort, Gentle Discovery | Silky-smooth finish, subtle waves, very light ripples. | A smooth, gently curved vibrator. |
| The Explorer | New Sensations, Moderate Intensity | Graduated beads, defined but rounded ridges, swirling patterns. | A rabbit vibe with a textured shaft. |
| The Connoisseur | Intense Stimulation, Novelty | Complex multi-textures, sharp-angled (but safe) ribs, distinct nubs. | A dual-stimulator with varied patterns. |
By thinking through this framework, you move from creating random patterns to engineering specific sensory experiences. This level of thoughtfulness is what builds brand loyalty and gets people talking about your products.
What Does the Technical Process of Creating TPE Textures Involve?
You have a perfect texture design on paper, but turning it into a physical product presents a new challenge. If the manufacturing process isn’t handled with care, your beautiful design can turn into a blurry, inconsistent mess. You risk wasting money on molds and producing a subpar product.
Creating TPE textures is a precise, multi-step process. It starts with high-resolution CAD design, followed by creating a master mold, often using CNC machining or 3D printing. This mold is then finished with techniques like laser engraving or chemical etching to create the final texture before being used in a carefully calibrated injection molding machine.
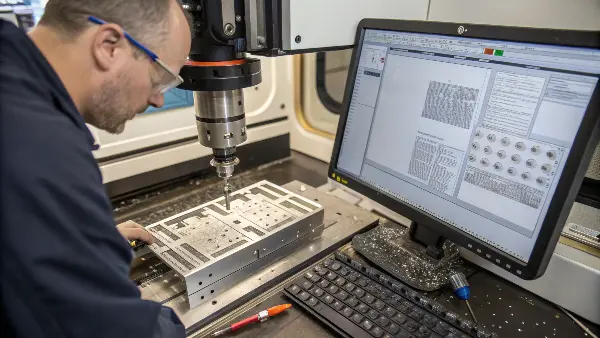
I always tell my clients that the mold is the heart of the product. An investment in a high-quality mold pays for itself many times over. I remember a project where we wanted a very fine, matte texture. The initial mold, finished with standard polishing, wasn’t right. The TPE came out too slick. We had to go back and use a specialized sandblasting technique on the mold surface. It was an extra step, but the result was a perfect velvety finish that became the product’s signature feature. It’s this attention to detail in the manufacturing process that brings a sensory vision to life.
Breaking Down the Manufacturing Journey
Let’s walk through the key stages that transform a digital concept into a tangible, textured product. Each step is critical for achieving the desired outcome.
Step 1: Digital Design (CAD) and Prototyping
Everything begins with a 3D Computer-Aided Design (CAD) model. This is where the exact shape, size, and texture pattern are digitally sculpted. At this stage, it’s crucial to consider manufacturing limitations. Textures that are too deep or have sharp "undercuts" can be difficult or impossible to release from the mold. Once the CAD model is finalized, we often create a 3D-printed prototype. This allows you and your team to physically hold the design and provide feedback on the feel of the texture before committing to expensive metal tooling.
Step 2: Mold Creation (Tooling)
This is the most critical and costly phase. A negative of your product is carved into durable metal blocks, usually steel or aluminum.
- CNC Machining: A computer-controlled machine carves the basic shape of the mold with extreme precision.
- Texture Application: This is where the magic happens. The fine details of the texture are added to the mold’s surface. Common methods include:
- Chemical Etching: A corrosive acid is used to eat away at the mold surface, creating uniform patterns like a sandblasted or matte finish. It’s great for subtle, non-geometric textures.
- Laser Engraving: A high-powered laser etches the texture pattern directly onto the mold. This method offers incredible precision and is perfect for complex, sharp, and geometric patterns like ribs, logos, or intricate swirls.
- EDM (Electrical Discharge Machining): An electrical spark is used to erode the metal, creating textures. It’s excellent for creating specific surface roughness.
Step 3: Injection Molding Calibration
With the finished mold mounted in an injection molding machine, the final step is to dial in the process parameters. This is as much an art as a science.
- TPE Material Selection: The exact grade of TPE is chosen for its hardness and feel.
- Temperature: The TPE must be heated to the optimal temperature. Too hot, and it might lose detail; too cool, and it won’t fill the mold completely.
- Injection Pressure & Speed: The speed and pressure at which the molten TPE is injected into the mold cavity determine how well it captures the fine texture details. A slow injection might be needed for delicate patterns, while a faster one might be better for filling a large part.
- Cooling Time: The mold is cooled to solidify the TPE. The timing must be precise to prevent warping or surface defects as the part is ejected.
Only by controlling every variable in this journey can we ensure that the TPE product that comes out of the mold perfectly matches the sensory experience you first envisioned.
How Can You Effectively Test and Validate TPE Texture Prototypes?
You’ve received your first batch of prototypes, and they look great. But looks can be deceiving. Without a proper validation process, you might approve a prototype that has subtle flaws, leading to inconsistent quality in mass production or, worse, a product that doesn’t feel as good as it looks.
Effective validation involves a two-pronged approach: technical testing and human feedback. Technical tests, using tools like durometers and calipers, confirm hardness and dimensional accuracy. Human feedback, gathered from a trusted test panel, provides essential qualitative insights on comfort, sensation, and overall user experience. This combination ensures the product is both well-made and well-loved.
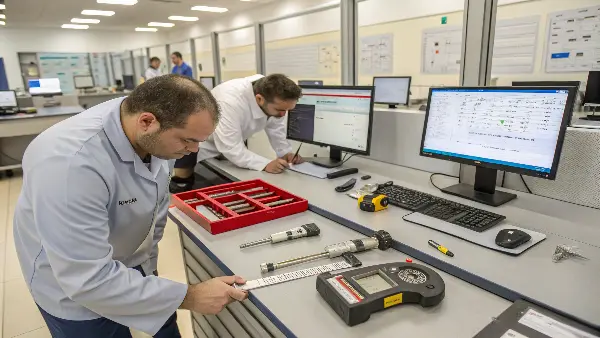
A few years ago, we were developing a new product with what we called a "wave" texture. The technical specs were perfect—the dimensions were exact, and the TPE hardness was spot-on. But when we sent it to our small panel of testers, the feedback was unanimous: the "waves" felt more like "jabs." The edges were too sharp, even though they were microscopic. We went back, slightly rounded the edges in the mold, and sent out a new batch. The response was glowing. That experience taught me that data is important, but you can never replace real human feedback.
Your Essential Texture Validation Checklist
To ensure your final product is a winner, you need a systematic approach to testing your prototypes. A simple checklist can help you cover all the bases, ensuring nothing is overlooked before you give the green light for mass production. This process saves time, money, and protects your brand’s reputation.
Part 1: Technical Inspection (The Quantitative Data)
This is where you check if the product was made to your exact specifications. It’s objective and based on measurable data.
[ ]Dimensional Accuracy: Use digital calipers to measure the overall size, as well as the height and spacing of the texture elements (e.g., ribs, nubs). Does it match your CAD file?[ ]Hardness Consistency: Use a Shore durometer to test the TPE hardness at several points on the product. Is it consistent? Does it match the specified Shore value (e.g., Shore 00-50)?[ ]Visual Inspection: Examine the prototype under good lighting, perhaps with magnification. Look for defects like:- Flash: Thin, unwanted "wings" of TPE on the edges where the mold halves meet.
- Sink Marks: Small depressions or craters on the surface.
- Incomplete Fill (Short Shot): Areas where the TPE didn’t fully fill the mold, resulting in blurry or missing texture.
- Color Uniformity: Is the color consistent throughout the product?
Part 2: Sensory & User Experience (The Qualitative Feedback)
This is the subjective but most important part of the test. It answers the question: "How does it actually feel?"
[ ]Initial Tactile Feel: How does the texture feel in the hand? Is it pleasant, intriguing, rough? Does the surface finish (matte vs. slick) match your intention?[ ]Lubricant Compatibility: Test the product with a recommended lubricant (always water-based for TPE). Does the texture feel different? Does it enhance or diminish the sensation?[ ]Comfort & Safety: Are there any sharp edges or points that could cause discomfort? Does the texture feel safe and inviting?[ ]Sensation Profile: This is the core of the user test. Ask your panel to describe the sensation. Use descriptive words. Is it "tingly," "thumpy," "rumbling," "intense," "gentle"? Does the feeling match the product’s marketing claims?[ ]Overall Experience: Ask for a final verdict. Would they recommend it? What would they change?
By combining these two approaches, you get a complete picture of your prototype. You can be confident that your product is not only manufactured correctly but also delivers the exceptional sensory experience your customers crave.
Conclusion
Mastering sensory engineering is what separates ordinary TPE products from extraordinary ones. By understanding TPE’s properties, designing for your specific audience, and meticulously controlling the manufacturing and validation process, you can create textures that deliver unforgettable experiences and build a loyal brand following.
