Creating a product that feels just right—soft in one place, firm in another—can feel like an impossible challenge. Get it wrong, and you risk negative reviews and a product that disappoints. Understanding the key manufacturing techniques for varying TPE hardness is the solution that bridges your design vision with a user’s perfect experience.
To achieve hardness variation in TPE adult products, manufacturers primarily use two-shot injection molding or overmolding. Two-shot molding creates a seamless product by injecting two different TPE grades in a single process. Overmolding involves molding a softer TPE layer over a firmer core. The choice depends on design complexity, budget, and desired feel, directly impacting the final product’s quality and user satisfaction.
This concept of dual or variable hardness is more than just a technical detail; it’s a cornerstone of modern adult product design. It’s what separates a basic toy from an advanced, nuanced experience that can better mimic the human body and cater to a wider range of preferences. As a brand owner, mastering this aspect of manufacturing gives you a significant competitive edge. Let’s dive deeper into how you can control and leverage TPE hardness to create exceptional products.
Why is TPE hardness so crucial for user experience?
You’ve spent months perfecting a new design, but early feedback says it’s "too rigid" or "unrealistically soft." This disconnect between your vision and the customer’s reality can sink a product launch. The key to avoiding this is deeply understanding how TPE hardness, measured in Shore durometers, directly translates into physical sensation.
TPE hardness, measured on the Shore scale (typically Shore 00 for gels and Shore A for rubbers), directly dictates the product’s feel. A softer tip (e.g., Shore 00-30) delivers a gentle, cushiony sensation ideal for sensitive areas. A firmer core or shaft (e.g., Shore A 10-20) provides the necessary structure, stability, and pressure for internal use. Balancing these elements correctly is essential for creating a satisfying and realistic product.
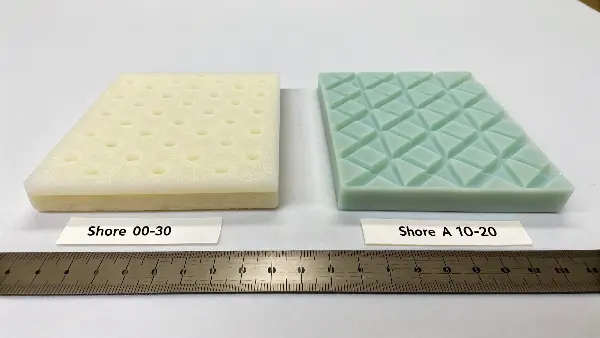
When we talk about hardness, we’re really talking about how a material responds to pressure. For your customers, this translates directly to comfort, realism, and intensity. I remember when we were developing our first dual-density vibrator. The initial prototype had a single hardness, and the feedback was lukewarm. It was functional but lacked… personality. We then created several versions with a softer head and firmer shaft. The difference was night and day. A small change from a Shore A 10 shaft to a Shore A 15 made it feel more robust, while dropping the head’s hardness to Shore 00-40 made it incredibly gentle. That experience taught me that a few points on the Shore scale can fundamentally change a product’s appeal.
Understanding the Shore Hardness Scale in Practice
To make informed decisions, you need to speak the language of durometers. In the TPE world, we primarily use two scales: Shore 00 for ultra-soft, gel-like materials and Shore A for firmer, rubbery plastics.
- Shore 00 Scale: This scale measures extremely soft materials. Think of a gummy bear or gel insert. A Shore 00-30 is very soft and yielding, while a Shore 00-60 feels more like a soft rubber eraser.
- Shore A Scale: This scale picks up where Shore 00 leaves off. A Shore A 5 is a very soft rubber, while a Shore A 90 is almost as hard as a shopping cart wheel.
Combining hardness levels from these scales is where the magic happens. A product can have an ultra-soft tip for comfort and a firm internal "skeleton" for structure and vibration transfer.
| Shore Hardness | Common Feel Description | Typical Use in Adult Products |
|---|---|---|
| Shore 00-20 | Extremely soft, gel-like | Ultra-soft tips, enhancers, clitoral stimulator heads |
| Shore 00-50 | Soft and very squishy | Lifelike dildo exteriors, stroker sleeves, soft packer bodies |
| Shore A 5-15 | Firm but flexible | Dildo shafts, internal vibrators needing structure |
| Shore A 20-40 | Very firm, semi-rigid | Handles, suction cup bases, harness-compatible bases |
What are the main manufacturing methods for achieving different hardness levels?
You have a brilliant dual-hardness design, but turning that concept into a high-quality, reliable product seems daunting. Choosing the wrong manufacturing path can lead to soaring costs, production delays, and a final product that literally falls apart. Knowing the difference between the primary methods—two-shot molding and overmolding—is critical for success.
The two main methods are two-shot (or co-injection) molding and overmolding. Two-shot molding injects two compatible TPE materials into the same mold sequentially, creating a strong chemical bond. Overmolding is a two-step process: a firm "core" is molded first, then placed in a second mold where the softer TPE is injected over it. The best method depends on your production volume, design complexity, and budget.
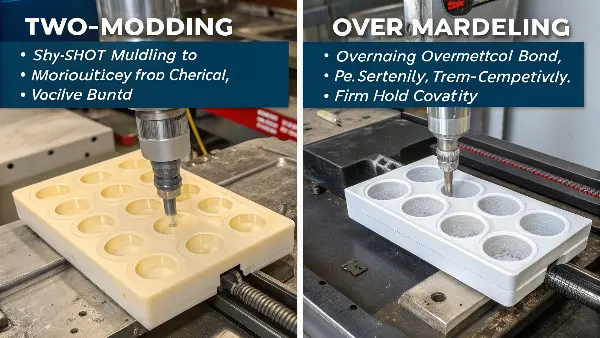
The choice between these two techniques is one of the most important decisions you’ll make with your manufacturing partner. It impacts everything from the upfront tooling investment to the final product’s durability and feel. Two-shot molding is sleek and efficient for mass production, while overmolding offers a more accessible entry point for complex designs or smaller batches. Each has its place, and understanding their pros and cons will empower you to have more productive conversations with your supplier.
A Deeper Look: Two-Shot Molding vs. Overmolding
Let’s break down these two processes so you can identify which is a better fit for your project.
1. Two-Shot Injection Molding (Co-Injection)
This is an advanced, automated process. A specialized molding machine with two injection units shoots the first material (e.g., the firmer TPE for a core) into a mold. The mold then rotates, and the second unit injects the softer TPE into the remaining cavity, fusing it with the first shot.
- Pros: Creates a very strong, permanent chemical bond between the layers. The finish is seamless, with no visible parting line. It’s also much faster for high-volume production, leading to a lower per-unit cost once you’re at scale.
- Cons: The initial investment in the complex mold is significantly higher. It also requires the two TPE materials to be chemically compatible to ensure a proper bond, limiting material combinations slightly.
2. Overmolding
This is a more traditional, two-step process. First, the harder substrate (the core or skeleton) is created in a standard injection mold. Then, that finished part is either manually or robotically placed into a second, slightly larger mold. The softer TPE is then injected into the new mold, flowing over and around the hard substrate.
- Pros: The tooling costs are generally lower since the molds are simpler. It offers more flexibility in material pairings, as the bond can be mechanical (the soft material physically locks into holes or grooves in the hard part) as well as chemical.
- Cons: The process is slower and more labor-intensive, which can increase the per-unit cost. If not designed properly, the bond can be weaker than with two-shot molding, posing a risk of delamination (the layers separating) over time.
| Feature | Two-Shot Injection Molding | Overmolding |
|---|---|---|
| Process | Single machine, automated process | Two-step process, often involves part transfer |
| Bonding Integrity | Excellent (strong chemical bond) | Good to Excellent (relies on chemical and/or mechanical lock) |
| Tooling Cost | High | Moderate |
| Per-Unit Cost | Lower at high volumes | Higher due to longer cycle times and labor |
| Best For | High-volume production, seamless aesthetics | Prototyping, lower volumes, designs with undercuts |
How do you choose the right TPE hardness combination for your product?
You’re looking at a TPE supplier’s spec sheet, and the range of hardness options is paralyzing. Picking the wrong combination could result in a product that feels cheap, is uncomfortable, or simply fails to perform its intended function. The solution is to think like an engineer: base every hardness decision on function first.
To choose the right TPE hardness, first break down your product into functional zones (e.g., tip, shaft, base). Assign a primary purpose to each zone, then select a Shore hardness that best serves that purpose. For example, a tip for gentle stimulation needs a soft Shore 00-30, whereas a base for stability requires a firm Shore A 20+. Always create and test physical prototypes to confirm your choices.
Thinking about hardness without context is a recipe for failure. A "soft" product isn’t inherently better than a "firm" one. The question is, "Soft or firm for what purpose?" A product designed for powerful, deep-pressure massage needs firmness to transfer energy effectively. A product designed for gentle, clitoral teasing needs to be cloud-soft. By adopting a function-first mindset, you move from guesswork to strategic design, ensuring every part of your product is perfectly tuned for its role.
A Practical Guide to Function-First Hardness Selection
Let’s use a common product type—a G-spot dildo—to illustrate this process. We can break it down into three critical zones.
Zone 1: The Head/Tip
- Function: To provide a comfortable entry and a gentle, focused sensation on a highly sensitive area. It needs to be yielding and soft.
- Hardness Recommendation: Shore 00-30 to Shore 00-50. This ultra-soft range ensures the tip is forgiving and pleasant, preventing any feeling of being "poked." It feels more like human tissue, enhancing realism and comfort.
Zone 2: The Curved Shaft
- Function: To maintain a specific anatomical curve that can apply consistent and targeted pressure internally. It needs to be firm enough to hold its shape but flexible enough to move with the body.
- Hardness Recommendation: Shore A 5 to Shore A 15. This is the "firm-flex" sweet spot. It’s solid enough to not collapse under pressure, effectively targeting the G-spot, but it still has enough give to be comfortable during use. This is where the dual-density feel really shines.
Zone 3: The Base
- Function: To provide a secure grip for manual control and a wide, stable bottom for safety (preventing it from getting lost) and, often, for suction-cup functionality.
- Hardness Recommendation: Shore A 20 to Shore A 40. This semi-rigid hardness gives the user confidence and control. A soft, flimsy base would make the product difficult to handle and potentially unsafe. This firmness is also necessary to embed a strong suction cup.
By defining the job of each section first, the hardness choices become logical and clear. This methodical approach minimizes risk and dramatically increases the chances of creating a product that customers love on the first try.
What are the common manufacturing challenges with variable TPE hardness?
Your dual-hardness samples from the factory were perfect, but the first mass production run is plagued with problems. Reports of layers separating or colors bleeding can create a brand nightmare, leading to costly recalls and shattered customer trust. You can avoid this by anticipating the common pitfalls of dual-hardness manufacturing from the start.
The most common challenges are delamination (layer separation), color bleed, and inconsistent hardness. Delamination often stems from poor bonding between incompatible TPE grades or incorrect processing temperatures. These issues are preventable with rigorous material testing, strict process controls, and partnering with a manufacturer who has deep expertise in TPE chemistry and co-injection molding.
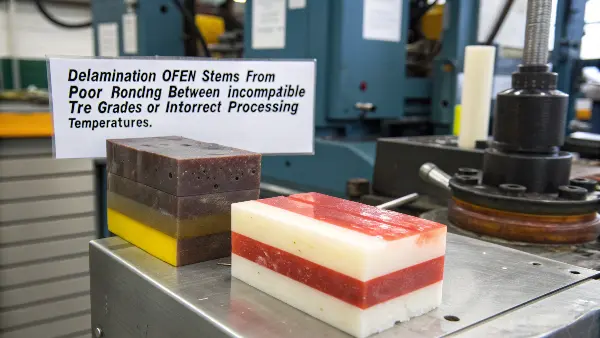
Working with two different materials simultaneously doubles the potential for things to go wrong. It’s not as simple as just shooting two plastics into a mold. They have to interact perfectly under intense heat and pressure. As a brand owner, you don’t need to be a chemical engineer, but you do need to know what questions to ask your supplier to ensure they have these variables under control. It’s the key to protecting your investment and your brand’s reputation for quality.
Preventing and Solving Key Dual-Hardness Defects
Here are the top three issues I’ve seen over my years in manufacturing and how a good partner can prevent them.
1. Delamination
This is when the soft TPE layer peels away from the firm core. It’s a critical failure that makes the product unusable and unsafe.
- Causes: The two TPE materials are not chemically compatible. The mold or material temperatures are incorrect, preventing a strong molecular bond from forming. Contaminants like mold-release agents are on the surface of the core part.
- Solutions: The manufacturer must use TPE grades specifically designed for co-molding or overmolding from the same chemical family (e.g., two SEBS-based TPEs). They need precise, digitally controlled temperature settings for the mold and injection barrels. A strict, documented mold cleaning protocol between cycles is also non-negotiable.
2. Color Bleed
This occurs when the colorant from one TPE layer (usually the darker one) slowly migrates into the adjacent layer, creating a blurry, unprofessional look.
- Causes: Using low-quality or unstable color masterbatch where the pigment particles are not properly encapsulated.
- Solutions: Your supplier must source high-quality, non-migrating pigments designed for TPEs. We always test new color combinations by aging samples in an oven, which accelerates any potential bleed and reveals problems before mass production begins.
3. Inconsistent Hardness
This is when the hardness of a product varies from batch to batch, or even within the same batch. One product might be perfectly soft, while the next is unpleasantly hard.
- Causes: Poor quality control on incoming raw material batches. Inaccurate mixing of the TPE polymer with the softening oils. Fluctuations in processing parameters like temperature and cycle time during the production run.
- Solutions: A reliable manufacturer implements strict Incoming Quality Control (IQC) to test every batch of raw TPE. They should use automated, computer-controlled dosing and mixing systems to eliminate human error. Finally, using Statistical Process Control (SPC) to monitor key parameters during production ensures every single unit meets the exact same specification.
Conclusion
Mastering TPE hardness is about more than materials; it’s about understanding sensation. It requires choosing the right manufacturing method for your design, strategically selecting hardness levels based on function, and partnering with a supplier who can navigate the technical challenges to ensure flawless, consistent execution.
